Add Row
Add Element
cropper
update
What's Up San Diego
update
Add Element
  • Home
  • Categories
    • San Diego Beaches /Fun At The Beach
    • San Diego Attractions / What's Happening
    • Walking San Diego / Health & Exercise
    • Eating & Cooking: Training & Tips
    • YOU / Self Help & Business Co-op
    • Class: Clean Living And Staying Sobe
    • Local Insights
    • Business Co-op
    • Business Spotlights
October 10.2025
3 Minutes Read

Create Your Own Anti-Aging Rosehip Face Serum for Radiant Skin

DIY Anti-Aging Rosehip Face Serum

Unlock Radiance: The Magic of DIY Rosehip Face Serum

In a world inundated with skincare products boasting miracles, creating your own anti-aging rosehip face serum at home can be a transformative experience. Rosehip oil, renowned for its regenerative properties, is your secret weapon against aging. But it’s not just about restoring youthful skin; it’s about understanding and tailoring the ingredients that suit your unique skincare needs.

Why Choose Homemade Skin Care?

Making your own skincare offers unmatched transparency and personalization. With every drop of your homemade serum, you know exactly what you’re applying to your skin. This knowledge fosters trust, especially for those conscious of the synthetic chemicals often found in commercial products. When you mix your serum, you can select high-quality, natural ingredients that align with your health goals, promoting not just skin vitality, but overall wellbeing.

Key Ingredients: Nature’s Bounty

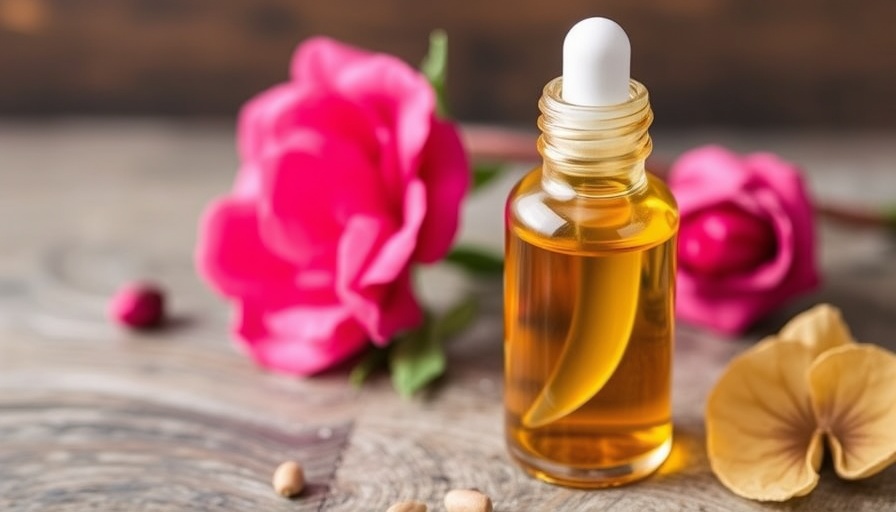
The DIY rosehip face serum exemplifies the power of nature. Each oil contributes uniquely to the blend:

  • Rosehip Seed Oil: The hero of this serum, rich in vitamins A, C, and E, helps combat fine lines and enhances skin texture.
  • Evening Primrose Oil: Packed with gamma-linolenic acid (GLA), it helps maintain skin hydration and can soothe irritation, crucial for aging skin.
  • Sea Buckthorn Oil: This oil boasts remarkable antioxidant properties and aids in collagen synthesis, protecting and repairing the skin barrier.

Using these oils together not only amplifies their individual benefits but also fortifies the skin’s overall health, ensuring that the serum is a potent ally in your anti-aging arsenal.

Step-by-Step: Your DIY Anti-Aging Serum Recipe

Creating your rosehip face serum is straightforward and rewarding:

  1. Ingredients:
    • 1½ tsp rosehip seed oil
    • ½ tsp evening primrose oil
    • ½ tsp sea buckthorn oil
    • Olive oil to fill
    • 6 drops vitamin E oil (optional)
    • 6 drops frankincense essential oil (optional)
  2. Preparation: In a clean dropper bottle, combine the selected oils. Add olive oil until full, leaving space for the dropper. Shake to mix evenly.
  3. Application: Massage a few drops onto clean skin. Feel the silky texture dissolve into your skin, providing instant nourishment.

The Beauty of Consistency

For optimal results, make applying your serum a daily ritual. With consistent use, you can expect to see improvements in skin tone, texture, and hydration over time. The calming scent of frankincense also adds an aromatic experience that complements its skin-rejuvenating properties.

Inspiration from Nature

Inspired by nature’s most powerful botanicals, the rise of DIY skin care encourages not just individualistic beauty solutions but also a more sustainable approach to personal care. By embracing natural ingredients, you partake in a movement against the use of filler ingredients and harsh chemicals, fostering a return to authentic beauty.

Embrace Your Skin Journey

As you embark on your DIY skincare adventure, remember to celebrate the beauty of your individual journey. Each formulation will be unique, reflecting your skin's needs and your personal preferences. By taking charge of your skincare, you not only enhance your appearance but also nurture a positive relationship with self-care.

Eating & Cooking: Training & Tips

25 Views

3 Comments

Write A Comment

*
*
Please complete the captcha to submit your comment.

mKFmiRkZawCFFbrlmQO

10.29.2025

tUHqniodYttPFGenCGepZz tUHqniodYttPFGenCGepZz

PzbLsullzrXHutYIbQdOVOu

10.28.2025

aTyfDqVYToJTYBGHgVysx aTyfDqVYToJTYBGHgVysx

eUZFvrwjnIkuokzMEN

10.23.2025

tvuYDzMHKcYqyKKmIMvnGc tvuYDzMHKcYqyKKmIMvnGc

Related Posts All Posts
04.04.2026

Discover How Amber Light Bulbs Can Enhance Your Sleep Quality

Update Unlocking the Secret to Better Sleep: The Power of Amber Lighting For years, I struggled with sleep, despite following all the standard advice: magnesium supplements, avoiding screens, and maintaining a cool bedroom. Yet, I still found myself wide awake at 3 AM, tossing and turning. The change that finally made a difference? Transforming my home's lighting. It turns out that the wavelengths emitted by the bulbs we use can significantly impact our sleep cycle. If you're like me, you might have thought that 'warm white' LED lights were gentle enough. However, they still emit enough blue light—like that of midday sun—to disrupt your circadian rhythm. This discovery led me to a crucial question: What kind of light really aids sleep? What Makes Amber Light Unique? The answer lies in the spectrum of light. Standard bulbs often still emit blue light in the 440-480 nm range, which not only suppresses melatonin, your sleep hormone, but confuses your internal clock. A true amber bulb, on the other hand, emits light without any blue or green wavelengths, ensuring your brain reads it as a signal for winding down. Simply put, amber light allows your body to recognize evening and promote melatonin production, setting the scene for restful sleep. Choosing the Right Amber Bulbs and Setting Them Up After thorough research, I replaced my standard lighting with true amber bulbs in key areas of my home, especially in the evening. The most impactful change was in my bedroom and living room, spaces where I wind down. I make sure to use lamps that are at eye level or lower, as overhead lights can be inherently disruptive. When shopping for amber bulbs, look for those advertised as having zero emissions below 530 nm, which is crucial for melatonin safety. Additionally, choose flicker-free options to reduce eye strain and discomfort, and go for low EMF bulbs to keep your sleep environment free from unnecessary disturbances. Creating an Evening Routine with Light Transforming your light environment doesn’t require a complete overhaul. Start by swapping out bulbs in areas you use most during the evening. I personally use a combination of amber-setting bulbs that switch modes automatically at sunset, creating a cozy atmosphere in my home that tells my body it's time to relax. Here’s a simple daily lighting schedule I’ve implemented: Morning (wake – 9 am): Bright natural light, no interference. Daytime (9 am – 5 pm): Standard lighting for productivity. Early Evening (6 pm): Switch to amber light for all lamps. Late Evening (8 pm): Only use red light in the bedroom and bathroom. Overnight: Complete darkness. This simple structure helps my body sync with its natural circadian rhythms, leading to falling asleep easier and staying asleep longer. The Big Sleep Benefits of Amber Lighting Switching to amber lighting has not only improved my quality of sleep but also my mood and overall well-being. Amber light promotes a natural flow of melatonin and serotonin, which in turn offers mood benefits. As sleep experts agree, maintaining proper melatonin levels can also mitigate issues like stress, anxiety, and overall emotional stability. Take Steps Towards Better Sleep Tonight! If you’ve been struggling to get restful sleep, consider transforming your lighting as the first step towards improving your sleep hygiene. Many people notice significant improvements within just a few nights of switching to amber bulbs in their evening routines. Remember, setting the right environment can make all the difference.

04.03.2026

Spring Gardening Prep: Essential Tips for a Joyful Season

Update Get Ready for a Thriving Garden Season with These Spring Preparations Spring is upon us, and with its arrival, the excitement of gardening season begins anew. Whether you’re a seasoned gardener or a novice just starting your journey, preparing your garden effectively can set the stage for a bountiful and enjoyable growing experience. Here’s a comprehensive checklist to help you kick off a successful gardening season. Assess Your Garden and Climate Before digging in, take a moment to understand your local climate. Gardening changes dramatically depending on your region. The first step is determining your USDA Plant Hardiness Zone, which provides critical information about frost dates and suitable planting times. In warmer areas, you might enjoy a longer growing season, but even those in colder climates can maximize their yield with the right strategies. The Vital Role of Planning Planning your garden is akin to crafting a roadmap for success. Reflect on last year's gardening highs and lows. What thrived? What should be swapped out this season? Utilize a garden planner to record your ideas, or even a simple notebook to jot down what you envision for your space. Consider spacing out your plant varieties to avoid overcrowding and to facilitate crop rotation for enhanced soil health. Soil Testing: A Smart Starting Point One of the keys to a successful garden is understanding your soil’s composition. Consider performing a soil test—local extension services often offer resources for this. This informs you about nutrient levels and soil pH, ensuring you only add what your garden is missing. As Ryan McEnaney, a gardening expert, advises, knowing what’s already in your soil is crucial before making amendments. Loosening Soil and Composting Compacted soil can impede root growth and water absorption, so it’s crucial to loosen it appropriately. However, avoid excessive tilling which can disturb soil structure. Instead, integrate compost for improved structure and nutrition. Compost not only enriches your soil; it also promotes biodiversity in your garden, paving the way for healthier plants. Begin Your Seed-Starting Journey Once your gardening space is prepped, it’s time to start sowing seeds. Remember, timing is everything—some plants thrive in cooler weather, while others need warmer conditions. Begin with easy-to-grow varieties like peas or lettuce that can withstand slight frosts. Follow your region's planting schedule to ensure optimal growth. Equipping Yourself for Success Don’t forget to prepare your tools for the season ahead! Clean, sharpen, and inspect garden equipment to ensure it functions effectively. Well-maintained tools enhance efficiency and make your gardening tasks feel less chore-like. Pay attention to your irrigation systems as well; preventing leaks now can save you headaches later in the warmer months. Let’s Talk About Pests and Preventative Measures Starting your garden season also means being aware of potential pest issues. Before plants fully emerge, consider applying horticultural oils to manage overwintering pests. Regularly inspect your plants for signs of infestation and take preventive measures early. As seasoned gardeners know, the sooner these issues are managed, the less likely they are to spiral out of control. Wrap-Up: Nurture Your Green Space With these preliminary tasks checked off your to-do list, it's time to embrace the joy of gardening. Whether you're aiming for a colorful flower patch, a row of vegetables, or both, the satisfaction of watching your efforts bloom is unbeatable. Remember to take it one step at a time; gardening is a journey worth savoring. For a seamless spring gardening experience, start preparing today!

04.01.2026

Why You Need to Try Brown Butter Carrot Cake with Honey Cream Cheese Frosting

Update Discovering the Joy of Baking: Why Carrot Cake is a Must-Try Dessert Carrot cake is more than just a delicious dessert; it's a thriving tradition in many households, appreciated for its moist texture and delightful blend of flavors. The Brown Butter Carrot Cake with Honey Cream Cheese Frosting elevates this classic treat, making it both a health-conscious choice and a culinary adventure in the kitchen. Through the combination of fresh ingredients, like grated carrots and wholesome sweeteners like raw honey, this carrot cake embraces healthier substitutions without losing its comforting essence. Flavor Meets Nutrition: The Benefits of Carrots in Your Cake What sets this carrot cake apart? It’s all about the ingredients! The use of finely grated carrots not only adds natural sweetness but also infuses the cake with moisture, fiber, and essential vitamins like A, C, and K. Compared to traditional cakes laden with refined sugar and fats, this recipe calls for brown butter and honey, embracing a less sweet but deeply rich flavor profile. Many bakers are incorporating similar natural sweeteners in their desserts, recognizing their role in elevating taste while being mindful of health. A Creative Spin on Tradition: Gluten-Free Options to Consider Given the rise of gluten sensitivities, carrot cake recipes are now embracing gluten-free flour blends. This adaptation has become essential for many, yet it doesn’t compromise on taste or texture. In fact, numerous bakers have taken a cue from Gluten Free Carrot Cake with Brown Butter Frosting recipes, which infuse moistness and depth through various mix-ins like dried fruits and nuts. Combining the best of gluten-free flour with honey and brown butter leads to a celebratory dessert suitable for everyone. Making It Your Own: Customization and Variations The beauty of the Brown Butter Carrot Cake lies in its flexibility. Whether you opt for layers, cupcakes, or even a sheet cake, the concept remains the same: create a moist, flavorful dessert that feels indulgent but can be tailored to fit specific dietary needs. As noted in many carrot cake recipes, adding elements like crushed pineapple or various nuts can introduce delightful textures and tastes. Each variation tells a story of personal touch in the kitchen. Why This Cake is Perfect for Spring Celebrations As spring arrives, so does the season of gatherings, celebrations, and baked goods. The Brown Butter Carrot Cake serves as the ultimate centerpiece for Easter brunches, birthday parties, or simple family dinners. Its bright flavors coupled with the honey cream cheese frosting provide a joyful contrast to heavier winter desserts. A visually stunning four-layer cake is sure to impress, with the frosting blooming in vibrant colors and the cake offering slices of moist goodness. Connection with Health Trends: Baking as a Form of Self-Care The act of baking, shared among family and friends, is often seen as a unique form of self-care, promoting mental health through creativity and nostalgia. Today, as more people prioritize sustainability and well-being, recipes that merge enjoyment with health are increasingly popular. This sentiment resonates with many, inviting them to gather in kitchens and create lasting memories over a simple slice of carrot cake. Final Thoughts: Indulge in Harmony with Health If you’re searching for a delicious dessert that aligns with modern health-conscious choices, this Brown Butter Carrot Cake with Honey Cream Cheese Frosting offers the perfect blend of flavor and nutrition. It encourages a more mindful approach to baking, utilizing wholesome ingredients while promising a delightful treat for all those gathered. So why not embrace this opportunity? Dive in, experiment, and share the joy with your loved ones.

Terms of Service

Privacy Policy

Core Modal Title

Sorry, no results found

You Might Find These Articles Interesting

T
Please Check Your Email
We Will Be Following Up Shortly
*
*
*