cropper
update
What's Up San Diego
update
  • Home
  • Categories
    • San Diego Beaches /Fun At The Beach
    • San Diego Attractions / What's Happening
    • Walking San Diego / Health & Exercise
    • Eating & Cooking: Training & Tips
    • YOU / Self Help & Business Co-op
    • Class: Clean Living And Staying Sobe
    • Local Insights
    • Business Co-op
    • Business Spotlights
March 24.2025
3 Minutes Read

Unlock Your Hair’s Potential: Craft an Incredible DIY Hair Oil Treatment

DIY Hair Oil Treatment: Glass bowl of oil on blue towel.

Why DIY Hair Oil Treatment Is the Secret to Healthy Locks

In the quest for luscious, healthy hair, many people often overlook one simple truth: the best solutions often come from nature. Using a DIY hair oil treatment can nurture the scalp and rejuvenate your strands without breaking the bank or introducing harsh chemicals into your beauty routine. This homemade recipe harnesses the power of natural ingredients to offer deep conditioning benefits, paving the way for improved scalp health and hair vitality.

Ingredients That Nourish Your Hair

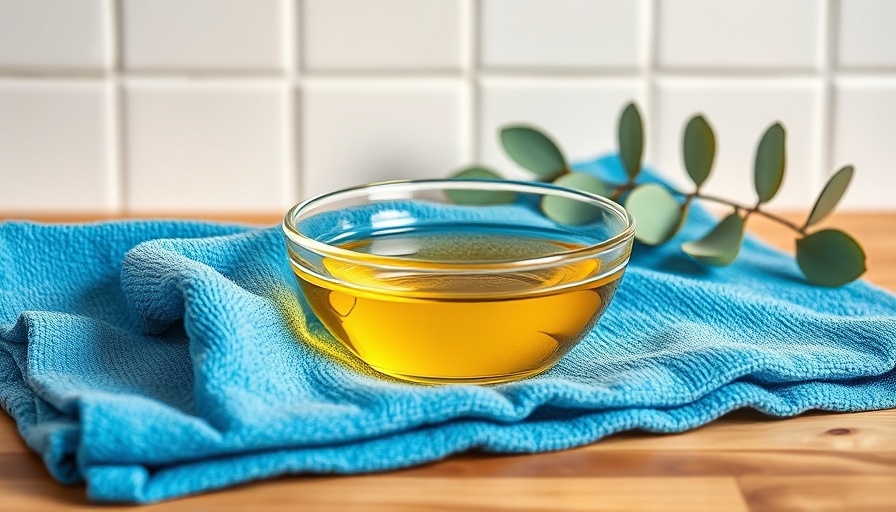
The core of any DIY hair oil treatment lies in its ingredients. This particular recipe combines olive oil and coconut oil—two powerhouse carriers known for their moisturizing properties. Olive oil is rich in antioxidants and vitamins that promote scalp health, while coconut oil provides unparalleled nourishment and penetrates the hair shaft effectively.

Adding Epsom salt not only enhances the texture of the oil but also introduces magnesium, essential for hair growth and overall scalp health. Furthermore, honey acts as a natural humectant, locking in moisture and promoting cell regeneration; its antimicrobial properties further safeguard against dandruff and scalp irritations.

How to Craft Your Own Hair Oil

Crafting your DIY hair oil effectively is a straightforward process. Begin by mixing two tablespoons of olive oil, one tablespoon of coconut oil, one tablespoon of raw honey, and one teaspoon of Epsom salt. For an aromatic touch, you can even add a few drops of essential oils like lavender or rosemary, both known for their hair-strengthening properties.

Once you've blended the ingredients, you’ll want to warm the mixture slightly, allowing everything to combine beautifully. A warm application not only enhances absorption but also transforms your hair treatment into a relaxing self-care ritual.

Embracing a Natural Beauty Routine

Using a DIY hair oil is not just good for the hair—it symbolizes a larger movement towards natural and sustainable beauty practices. With increasing awareness of the harmful effects of chemicals in conventional hair care products, many individuals are turning to homemade solutions that they can customize to their personal preferences.

The Benefits and Value of DIY Treatments

Knowledge of hair care is empowering. By understanding how to meet your hair's needs naturally, you take control of your beauty routine. This is especially beneficial in environments, such as sandy beaches or chlorinated pools, where hair often suffers due to exposure.

Common Misconceptions About Natural Hair Care

Some may assume that natural treatments are less effective than commercial products. However, the truth is that many store-bought options contain synthetic ingredients that can cause more harm than good. Focusing on nurturing your hair with natural ingredients fosters a healthier scalp and encourages growth without the risk of build-up or irritation.

A Regular Part of Your Self-Care Ritual

Implementing a DIY hair oil treatment into your routine doesn’t just cultivate beautiful hair but also contributes to a holistic approach to self-care. The soothing act of massaging oil into your scalp promotes relaxation and mental well-being, making it a fulfilling experience for both body and mind.

Eating & Cooking: Training & Tips

14 Views

0 Comments

Write A Comment

*
*
Please complete the captcha to submit your comment.
Related Posts All Posts
04.24.2026

Unlock Radiant Skin: Your Guide to Naturally Exfoliating Your Face

Update The Essential Guide to Natural Face Exfoliation Exfoliation is often mistaken for just scrubbing away at your face until it feels "clean." However, the reality is that it's much more nuanced and essential for skin health. Understanding how to naturally exfoliate your face can greatly enhance your skincare routine, resulting in brighter, smoother skin that radiates health. What Happens When We Exfoliate? Your skin is inherently capable of renewing itself, but as we age or when it experiences stress, this natural process slows down. The stratum corneum, or outer layer of your skin, comprises layers of dead skin cells that need regular shedding to keep the skin healthy and vibrant. In a typical cycle, this shedding happens every 28 days, but factors like age or environmental stressors can impede this process. The result? Duller skin, larger pores, and a less effective skincare routine. When you act to support your skin's natural exfoliation, you're not just focusing on the surface; you're tapping into what’s happening at the cellular level. But before diving into how to exfoliate, it’s crucial to differentiate between the methods available. Understanding Your Exfoliation Options Exfoliation can be categorized into two methods: physical and chemical. Physical Exfoliation: Scrubbing for Perfection This method involves using scrubs or tools to remove dead skin cells through friction. However, caution is advised. Aggressive scrubbing can lead to microtears, causing irritation rather than the smooth skin we seek. Thus, the choice of exfoliating material matters greatly; gentle options like fine sugar or ground oats are more effective and less damaging than harsher materials. Chemical Exfoliation: Targeted Touch Chemical exfoliants utilize natural acids or enzymes that dissolve the bonds between dead skin cells, promoting a more uniform shedding of skin. This method can be more controlled, allowing for less irritation overall when done properly. Many people shy away from chemical exfoliants due to concerns about harshness, but gentle options such as those found in fruits like papaya can enhance your skincare routine effectively. Why Exfoliation is Key to Skincare Regular exfoliation can profoundly improve your skin’s texture, brightness, and resilience. Not only does exfoliating help clear pores and reduce the appearance of fine lines, but it also enhances the absorption of other skincare products, maximizing their benefits. The better your skin feels, the more confident you’ll appear! Common Exfoliation Mistakes One of the most common pitfalls in exfoliation is over-exfoliating, which can weaken the skin barrier and lead to increased sensitivity. Symptoms of over-exfoliation include redness, stinging, and even breakouts, indicating that your skin needs a break. It’s important to know your skin type—those with sensitive skin should limit exfoliation to once weekly, while oily skin might tolerate more frequent treatments. Practical Tips for Effective Exfoliation Here are some steps to ensure you exfoliate safely and effectively: Frequency Matters: For most skin types, exfoliating 1-2 times a week is sufficient. Oily skin may benefit from more frequent treatments, while sensitive skin should be more conservative. Timing is Everything: Evening exfoliation may help clear away impurities accumulated during the day, while morning exfoliation can prepare your skin for the day ahead. Hydrate Post-Exfoliation: After exfoliating, follow up with a soothing toner or moisturizer to support your skin’s recovery process. Homemade Natural Exfoliators You Can Try If you’re looking to get creative, several DIY natural exfoliants can be incorporated into your skincare regime: Simple Sugar Scrub: Combine sugar with coconut oil for a gentle scrub. Oatmeal and Honey Mask: This combination nourishes your skin while providing a gentle exfoliation. Coffee Grounds: They serve double duty, exfoliating while also delivering antioxidants. By understanding the science and art of exfoliation, you’ll be better equipped to enhance your skincare routine, promoting healthier, more resilient skin. If you have any additional tips or experiences to share, feel free to leave a comment!

04.24.2026

The Ultimate Guide to Naturally Exfoliate Your Face for Glowing Skin

Update Understanding the Science of Exfoliation Exfoliation has often been misunderstood as merely a method of scrubbing the face to remove dirt and impurities. However, true exfoliation is much more nuanced—it supports the skin’s natural renewal process. At its core, the skin is a remarkable organ that undergoes a continuous cycle of shedding dead skin cells through a process known as desquamation. For youthful skin, this cycle takes about 28 days. Yet, factors such as aging and environmental stressors can slow this process, leading to dullness and uneven texture. The Battle of Exfoliation Types: Manual vs. Chemical When it comes to exfoliation techniques, you have two main categories: mechanical and chemical. Mechanical exfoliation involves using physical methods, such as scrubs, brushes, or cleansing devices. For example, a DIY sugar scrub offers immediate results but runs the risk of microtears, which can irritate the skin. On the flip side, chemical exfoliants employ acids like AHAs (alpha hydroxy acids) and BHAs (beta hydroxy acids) to dissolve the bonds between dead skin cells. These products may sound intimidating, but they can be gentler than their mechanical counterparts. For instance, natural solutions like yogurt or citrus can offer a mild yet effective chemical exfoliation. The Right Balance: How Often Should You Exfoliate? The key to effective exfoliation is frequency. Over-exfoliating can lead to damaging the skin’s barrier, causing irritation and increased sensitivity. Generally, most skin types benefit from exfoliating 1-2 times a week. For those with oilier skin, 2-3 times may be appropriate using gentle methods. Conversely, individuals with sensitive skin should limit exfoliation to once a week or less to avoid discomfort. What to Do Before and After Exfoliating A holistic approach to skincare means considering what happens before and after exfoliation. Before you exfoliate, start with a gentle cleanser to eliminate surface impurities, ensuring the exfoliant can work effectively. After exfoliating, your skin will be in a prime position to better absorb nourishing ingredients, so follow up with a hydrating serum or moisturizer to support the fresh skin underneath. DIY Exfoliating Recipes to Try at Home Incorporating natural exfoliants into your skincare routine can be both enjoyable and effective. Here are some DIY options to consider: Gentle Oatmeal Scrub: Ground oats mixed with honey create a soothing exfoliant with anti-inflammatory properties. Fruit Acid Mask: A combination of mashed banana and lemon juice serves as a gentle chemical exfoliant. Simple Sugar Scrub: Combine sugar with coconut oil for a hydrating scrub that works to buff away dead skin cells effectively. Final Thoughts on Exfoliating Your Face Naturally Learning to exfoliate your face naturally is about understanding what your skin needs. Taking a balanced approach can lead to smoother, healthier skin without the risks associated with aggressive treatments. Remember to choose methods that align with your skin type and always listen to what your skin is telling you. If you are unsure where to start with your exfoliation journey, consider beginning with a gentle approach once a week. Your skin will likely respond positively as you nurture its natural processes!

04.21.2026

Unlock Culinary Creativity with Homemade Adobo Seasoning

Update Discover the Versatility of Adobo Seasoning: A Flavorful Fusion Adobo seasoning is not just a culinary staple; it’s an emblem of flavor that resonates deeply in various cuisines, primarily in Latin American, Caribbean, and Filipino dishes. The essence of adobo—stemming from the Spanish word “adobar,” meaning “to marinate”—is rooted in a harmonious blend of spices that brings warmth and zest to your meals. What Makes Adobo Seasoning a Kitchen Essential? At its core, adobo seasoning combines traditional ingredients like garlic, oregano, and turmeric to create a flavorful base that elevates any dish without overwhelming it. This makes it a terrific all-purpose seasoning, perfect for meats, vegetables, and even soups. It has an adaptable flavor profile that allows it to seamlessly integrate into many recipes, while still providing a unique taste experience. How to Use Adobo Seasoning: Tips and Tricks What’s great about adobo seasoning is its versatility. One can mix it into marinades for meats or stir it directly into soups and sauces. It also shines as a dry rub or seasoning for grilled veggies. For those concerned about sodium intake, you can customize your blend by omitting salt or reducing its quantity, allowing for personal dietary preferences. A Simple Yet Flavorful Recipe To create your batch of adobo seasoning, gather the following ingredients: 2 tablespoons garlic powder 1½ tablespoons salt (to taste) 2 tablespoons dried oregano 2 tablespoons turmeric powder 2 tablespoons onion powder 1 tablespoon cumin 1 tablespoon black or white pepper 1 tablespoon paprika 1½ teaspoons chili powder Mix all these ingredients thoroughly in a glass jar and store them in a cool, dark place. The result is a seasoning mix that can be used generously across countless culinary creations. Storage Tips and Shelf Life Proper storage is vital to maintaining the freshness of your spices. Keeping your adobo seasoning in an airtight container, away from heat and sunlight, ensures that it retains its vibrant taste for up to six months. Remember, spices tend to lose their potency over time, so it's best to periodically refresh your supply. Adobo Seasoning and Health: A Sneak Peek If you’re embarking on a journey towards clean eating, adobo seasoning is a great ally. Its base ingredients contribute to various health benefits, such as improved digestion from garlic and anti-inflammatory properties from turmeric. Inspiring Your Culinary Journey Incorporating adobo seasoning into your cooking can ignite creativity in the kitchen. Whether you are a seasoned chef or a novice home cook, experimenting with this seasoning can lead to delicious discoveries. By adding a personal twist to classic recipes, you can nourish your body while satisfying your taste buds. So next time you fire up your stove, reach for homemade adobo seasoning and let your culinary imagination soar!

Terms of Service

Privacy Policy

Core Modal Title

Sorry, no results found

You Might Find These Articles Interesting

T
Please Check Your Email
We Will Be Following Up Shortly
*
*
*